In the Tenant Users page, you can perform the following actions – Add user, edit user, Delete user (single or bulk).
Adding users
- To get into the tenant settings page, click your user icon at the top right corner of the screen and select Company Settings.
- From the left pane select “Users and Control” (people icon) and then “Users”.
- Click the “Add New” button at the top right corner.
- In the “Add New Tenant User” screen enter the user’s information in the following fields:
*First name, *Last Name, *Email, Department (optional), Phone (optional), *Mobile, *Country Code, *Number of Results Per Page.
- If the user will be a tenant admin, select the radius option for “Is Tenant Admin”.
- You can also determine a security role for the user by selecting admin, standard, or any other created user role.
- Click the “Save” button at the bottom of the screen.
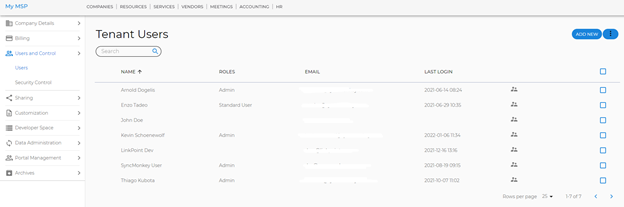
This is what the Tenant Users page looks like:
NOTES:
-
- The user’s email will be used as the user ID
- The user will get an invitation email with an initial password to complete the registration process.
- The mobile phone number will be used for Two-Step-Authentication.
- Fields marked in step 4 with * are required.
Editing users
- To get into the tenant settings page, click your user icon at the top right corner of the screen and select Company Settings.
- From the left pane select “Users and Control” (people icon) and then “Users”.
- Click the pen icon in the line of the user you wish to edit
- In the “Edit Tenant User” screen, change any details that require an update. In this field you are also able to assign roles and change the profile picture.
- Click the “Save” button at the bottom of the screen.
User deletion
- To get into the tenant settings page, click your user icon at the top right corner of the screen and select Company Settings.
- From the left pane select “Users and Control” (people icon) and then “Users”.
- On the right side of the users table, tick off the checkbox of the user or users you wish to delete.
- At the top right corner click the three dots icon button and select “Delete Selected Rows”.