Created as a way for clients to view and manage their own credentials and documents, the Client Portal also allows administrative contacts to access all of their employee credentials and update and maintain their payment information and invoices.
Sharing Documents
To make a document visible with in the client portal, you will need to click the pencil tool next to the document you want to make available and under the “Shared” section select yes.
Documents such as How-To guides or self-troubleshooting guides should be made available in the client portal.
Portal Access Roles
Client portal access roles are created within the company settings. Click the dropdown menu on the top right of the screen on the user icon, then from the menu select Company Settings. On the left pane click Portal Management and then Security Control.
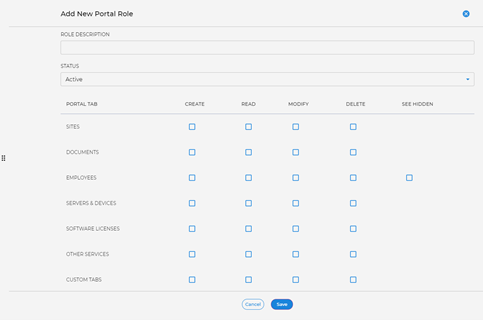
From here you can create new roles by clicking ‘Add New’ Icon where you will be asked for the following inputs: Role Name, Role Description, and Status. Check the boxes of the tabs and permissions you wish to grant to the new role. Click on the pencil icon next to the role to edit at anytime.
Enabling Access
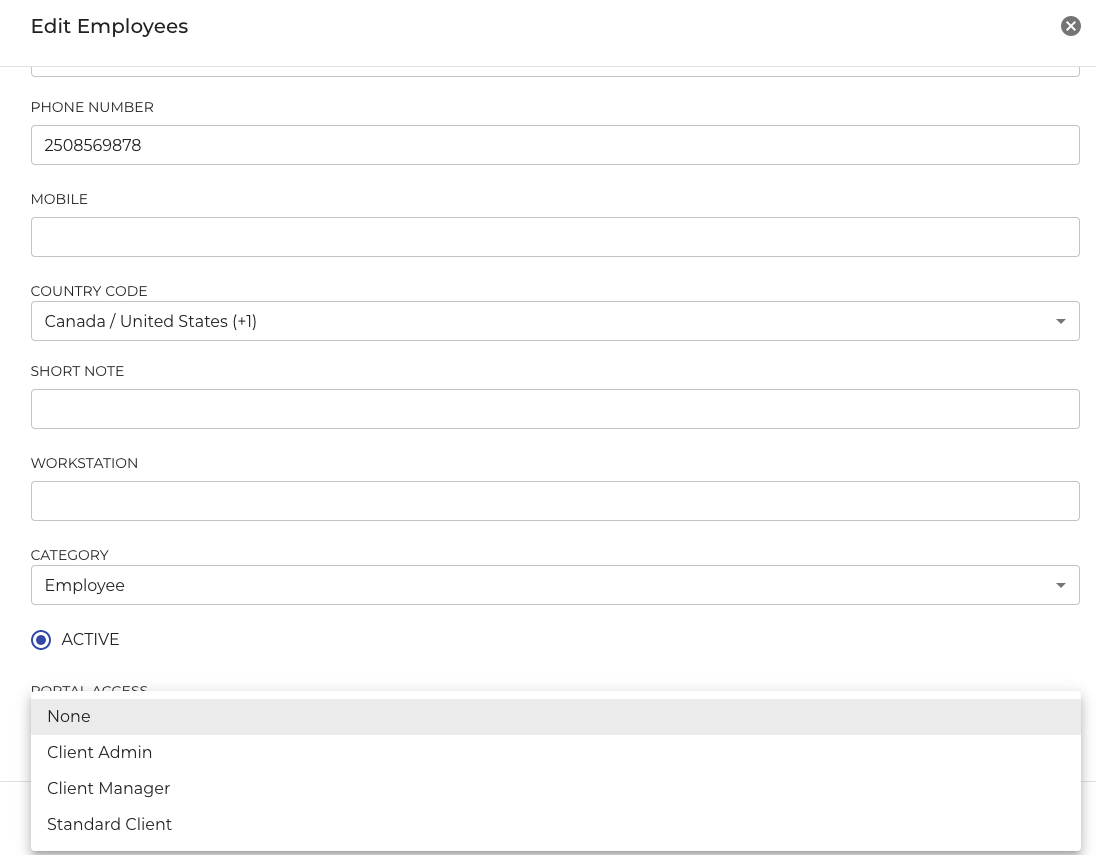
Client Portal access is enabled in the employee section of a company. Once you have an employee that will need access to the client portal. Navigate to the employee and click the pencil icon next to their name.
- Enter their email address
- Enter in their mobile number (for 2FA)
- Choose an appropriate country code
- Choose portal access level you wish to grant the user
- Save
The user will then get an email to activate their account. (Note, the link expires after 6 hours) If the window of activation is missed, access will need to be disabled and re-enabled.
Portal users must login through the URL: https://my.syncmonkey.com/portal/