Designed to act as a digital employee file that securely stores and tracks internal employee information such as contact information, performance reviews, and vacation tracking; the HR Module unifies all employee information into one central location.
To access the HR Module, you will need a premium SyncMonkey license. From the main dashboard click on the top ‘HR’ tab to bring up the main menu. From here you can access the following sidebar categories:
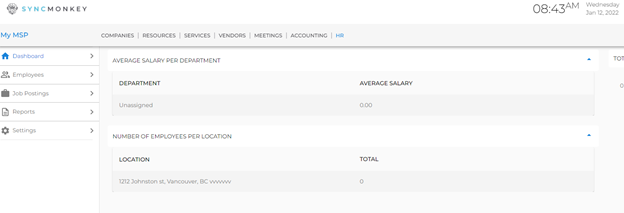
Dashboard: Track average salary per employee department, the number of employees per location, and view employee vacation details here.
Employees: A list of your employees and their information including contact information, birthday, start date, medical issues, department, salary, vacation profile, emergency contacts, and more. To edit and add information click on the pencil beside the desired employee. Click on the ‘Add New; tab to add new employees.
Job Posting: Store all of your different Job Posting templates here to easily keep track / copy job postings across multiple platforms. To add a new Job Posting click the ‘Add New’ button and enter in a title for the job posting, along with the content of the post.
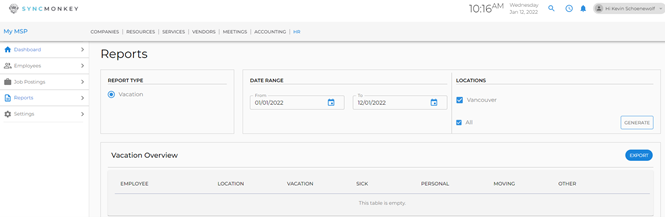
Reports: Generate a vacation report for a specific employee in this section. Select ‘Vacation’ as report type to prompt a date range, and specific location. Once completed click the ‘Generate’ button to bring up a vacation overview that lists the employee, location, vacation days, sick days, personal days, moving days, and other.
Settings: Used to create different ‘Vacation Profiles’ for each level of employee. To generate a ‘Vacation Profile’ click on the ‘Add New’ button and input the following information: Name, Vacation Days, Sick Days, Personal Days, and Moving Days. This vacation profile can be attached to employees by editing employees within the HR Module. Click on the HR Module tab at the top of the screen > Employees Side Tab > Edit pencil on Employee > Scroll to ‘Vacation Profile’ > select the corresponding Vacation Profile > Save at the bottom of the screen.
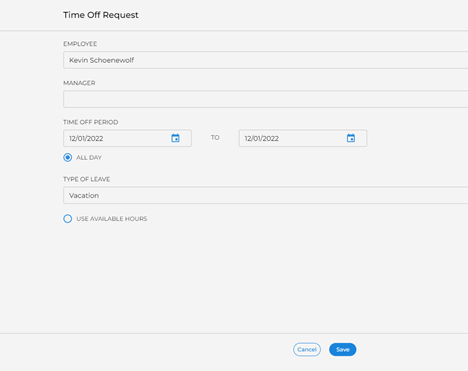
Requesting Time Off:
At the main SyncMonkey dashboard there is a section on the right hand side were SyncMonkey users can view their remaining time off, and request time off. Click on the ‘Request Form’ tab from the main dashboard and fill out the form below:
Note: *The employee must have a vacation profile attached to their account (HR>Employees>Edit>Vacation Profile) for the Time Off tracking to populate. Create a vacation profile by clicking the HR tab (top of screen) then clicking into settings, vacation profiles, and then add new.