SyncMonkey has a built-in extension that allows you to 1-way sync NinjaRMM companies
Setup
To setup the sync, first follow these steps on Ninja RMM
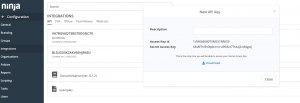
- Starting at your NinjaRMM homepage, go to Configurations > Integrations
- Select “Generate API Key” on top right of screen
- Write a description for your new API key, then copy and paste the Access Key ID & Secret Access Key
Next, move onto SyncMonkey and follow these steps:
- Starting at your SyncMonkey homepage select Company Settings (top right) > Developer Space > Extensions
- Install NinjaRMM integration if you haven’t done so yet
- copy and paste the Access Key ID & Secret Access Key that you got from NinjaRMM
- Input this as your host URL: https://api.ninjarmm.com
Data Administration
To test and manage the sync go to User Profile (top right corner) > Company Settings > Data Administration > NinjaRMM Sync.
This page will load your company list from NinjasRMM and allow you to choose which company to sync into SyncMonkey
It is important to note that depending on the size of the data it might take a few minutes to load this page initially.
To sync a company from NinjaRMM, simply check the checkbox in the appropriate line, then click the down arrow at the top right and select Sync. A progress report will be displayed on the screen showing how many companies synced or failed to sync.
Once sync is complete, click the Companies link at the top menu to view the imported information.

